Koha Manual Mubassir 2025
This training is Jointly organized by Digital Solution Bangladesh & Sothik IT on 8-10 March 2024. This online documentation will be valid till the training ends.
- Installation
- Server OS Installation
- Koha Frontend Installer
- Koha Backend Installation
- Koha Library Installation
- Koha Live Demo
- Configuration
- Library Setup
- Library Configuration
- Library Setup
- Configuring libraries and groups
- Defining item types
- Configure Circulation and Fine Rules
- Setting up patron categories
- Configure Authorized Values
- Cataloguing
- Label and Barcode Printing
- Circulation
- User Management
- Add New Patron/User
- Edit Patron/User
- Import Patron/User
- Patron /User List
- Patron Batch Modification
- Patron Card Creator
- Reporting
- Backup
Installation
Server OS Installation
Step 1: Download Debian ISO
- Go to the Debian Website and download the Debian installer ISO image suitable for your computer architecture (e.g., amd64 for 64-bit systems).
Step 2: Create a Bootable USB Drive
-
Insert a USB drive into your computer. Make sure it's empty, as all data on it will be erased during this process.
-
Download and install a tool like Rufus (for Windows) or balenaEtcher (for Windows, macOS, and Linux).
-
Open Rufus or balenaEtcher and select the Debian ISO file you downloaded.
-
Choose your USB drive as the target device.
-
Click "Start" to create the bootable USB drive. This process may take some time.
Step 3: Boot from the USB Drive
-
Restart your computer.
-
As your computer restarts, press the key to enter the boot menu. This key is usually F12, F11, ESC, or Del, depending on your computer's manufacturer.
-
Select the option to boot from the USB drive. It may be labeled as "USB" or "UEFI: USB" depending on your system's firmware.
Step 4: Install Debian
-
Once the Debian installer loads, you'll be presented with several options. Choose "Graphical Install" for an easier graphical installation process, or "Install" for a text-based installation.
-
Follow the on-screen instructions to complete the installation. You'll need to select your language, location, keyboard layout, and set up users and passwords.
-
When prompted, choose whether to use the entire disk or set up partitions manually. If you're unsure, you can choose the guided option for automatic partitioning.
-
Wait for the installation to complete. Once finished, you'll be prompted to restart your computer.
-
Remove the USB drive and press Enter to restart your computer.
Step 5: Post-Installation Setup
-
After your computer restarts, Debian should boot up from the hard drive. Log in with the username and password you created during installation.
-
You may want to update your system to ensure you have the latest software packages. Open a terminal and run:
sudo apt updatesudo apt upgrade
Koha Frontend Installer
-
Ensure Koha Services are Running: Before accessing the web installer, make sure that the necessary services, such as the Apache web server, are running. You can start Apache with the following command if it's not already running:
systemctl start apache2 -
Access Koha Web Installer: Open a web browser on the machine where Koha is installed, and enter the URL for the Koha web interface. By default, Koha's web interface is available at
http://localhost:8080. Replacelocalhostwith the IP address or hostname of your server if accessing remotely. -
When you see the login for the Koha installer, the username and password are in the koha-conf.xml file for the instance.
You can view the password with:
sudo koha-passwd librarynameThe default username is koha_libraryname
-
Complete the Web Installer: When you access the Koha web interface for the first time, you will be redirected to the web installer. The web installer will guide you through the process of setting up your Koha instance. You will need to provide information such as:
- Database settings (e.g., database name, username, password)
- System preferences (e.g., library name, time zone)
- Administrator account details (e.g., username, password)
-
Follow On-Screen Instructions: Follow the on-screen instructions provided by the web installer to complete the setup process. Make sure to review each step carefully and provide accurate information.
-
Complete Installation: Once you have completed all the steps in the web installer, Koha will be installed and configured according to the settings you provided. You should receive a confirmation message when the installation is successful.
-
Log in to Koha: After the installation is complete, you can log in to Koha using the administrator account credentials you specified during the installation process. You can then begin using Koha to manage your library.
Koha Backend Installation
- Add Koha package source:
apt-get update apt-get -y install sudo wget gnupg2 wget -qO - https://debian.koha-community.org/koha/gpg.asc | gpg --dearmor -o /usr/share/keyrings/koha-keyring.gpg apt-get update -
Add Koha repositories:
First, you need to add the Koha repositories to your Debian system. Create a new file/etc/apt/sources.list.d/koha.listusing a text editor (you'll need root privileges):sudo nano /etc/apt/sources.list.d/koha.listAdd the following lines to the file:
deb [signed-by=/usr/share/keyrings/koha-keyring.gpg] https://debian.koha-community.org/koha stable mainSave the file and exit the text editor.
-
Update Package Index: Update the package index to make sure your system has the latest information about available packages:
apt updateInstall Koha packages:
Install the Koha packages using theaptpackage manager. This will install Koha and its dependencies:apt-get install koha-common -
Install the database:
Install MariaDB (recommended).
apt-get install mariadb-server -
Configure the defaults:
Edit the file /etc/koha/koha-sites.conf and adjust it to suit the configuration that you'd like as set Intraport to 8080.
DOMAIN=".example.com"
INTRAPORT="8080"
INTRAPREFIX=""
INTRASUFFIX=""
OPACPORT="80"
OPACPREFIX=""
OPACSUFFIX="" -
Set up Apache2:
sudo a2enmod rewrite sudo a2enmod cgi sudo service apache2 restart -
Configure Apache port:
Configuring Koha for access by IP address with port 80 to OPAC and 8080 to Staff interface.Now edit /etc/apache2/ports.conf and make sure the following lines are present:
Listen 80 Listen 8080 - Restart Apache2
sudo systemctl restart apache2 -
Create a Koha instance:
Only do this if you are running MySQL locally.
Replace libraryname with the name of your library:
sudo koha-create --create-db libraryname
Koha Library Installation
To create a Koha instance, you typically use the koha-create command, which is part of the Koha package. This command sets up a new Koha instance with a specified name and database. Here's how to do it:
-
Open a Terminal: Open a terminal window on your Debian system.
-
Run the Koha Create Command: Use the
koha-createcommand to create a new Koha instance. The basic syntax is as follows:sudo koha-create --create-db <instance_name>Replace
<instance_name>with the name you want to give to your Koha instance. This command will create a new Koha instance with the specified name and set up the necessary database. -
Follow On-Screen Instructions: Once you run the command, you may be prompted to provide additional information, such as the MySQL root password. Follow the on-screen instructions to complete the instance creation process.
-
Start Koha Services: After the instance is created, you'll need to start the Koha services. This typically involves starting the Apache web server, which hosts the Koha web interface. You can start Apache with the following command:
sudo systemctl start apache2 -
Access Koha: After starting the services, you should be able to access your newly created Koha instance through a web browser. The URL will depend on your server's configuration, but it is typically
http://localhost:8080/<instance_name>. Replace<instance_name>with the name you gave to your Koha instance. -
Log in to Koha: When you access the Koha web interface, you'll be prompted to log in. Use the default administrator credentials, which are usually:
- Username:
kohaadmin - Password:
kohaadmin
- Username:
-
Change Default Password: After logging in, it's advisable to change the default administrator password to something more secure. You can do this through the Koha web interface by navigating to the administration section.
Koha Live Demo
Please use live demo for practice: \
Staff Interface:
Opac Interface:
username: 001
password: Training001
Configuration
Configure koha for library's environment
During Koha's web installer on-boarding configuring process, you'll be prompted to provide various settings and configurations to set up your Koha instance. Here's a general overview of what you can expect and what actions you might need to take:
-
Language Selection: Choose the language for the Koha interface. This will determine the language used in the user interface for both staff and patrons.
-
Library Name and Description: Provide a name and description for your library. This information will be displayed in the Koha interface and can help identify your library to staff and patrons.
-
Time Zone Configuration: Set the time zone for your library. This ensures that timestamps in Koha are displayed correctly according to your local time zone.
-
MARC Flavour: Select the marc flabour you need to use for your library's cataloguing.
-
Default circulation Rules Configuration: Set the default rules for the library. This can be edited later on.
-
Administrator Account Setup: Create the administrator account for your Koha instance. You'll need to provide a username and password for the administrator account. This account will have full access to the Koha system and can perform administrative tasks.
-
Database Configuration: Configure the database settings for your Koha instance. This includes specifying the database server, database name, username, and password. Koha uses a MySQL/MariaDB database to store its data, so you'll need to ensure that you have a MySQL/MariaDB server set up and accessible.
-
Additional Settings: Depending on your specific requirements, you may be prompted to configure additional settings during the on-boarding process. This could include configuring patron categories, item types, circulation rules, and more.
-
Review and Confirm: Review all the settings and configurations you've provided and confirm that they are correct. Once you confirm, Koha will finalize the configuration and set up your instance based on the provided settings.
-
Installation Completion: After the on-boarding configuring process is complete, Koha will finalize the installation and set up your instance. You'll receive a confirmation message indicating that the installation was successful.
Throughout the on-boarding configuring process, make sure to carefully review each step and provide accurate information to ensure that your Koha instance is set up correctly according to your library's requirements.
Library Setup
Library Configuration
Library Setup
Setting up a library in Koha's staff interface involves configuring various aspects of your library's operations, including defining library branches, item types, circulation and fine rules, patron categories, and more. Here's a step-by-step guide to setting up your library in Koha:
- Navigate to Administration: Click on the "Administration" tab in the top menu bar. This will open a dropdown menu with various administrative options.
-
Configure Libraries and Groups:
- Click on "Libraries" under the "Library" section. Here, you can configure library branches and define the organizational structure of your library system. You can add, edit, or delete libraries and library groups as needed.
-
Define Item Types:
- Under the "Catalog" section, click on "Item Types." Item types define the different types of items in your library's collection (e.g., book, DVD, magazine). You can add, edit, or delete item types and customize their properties.
-
Configure Circulation and Fine Rules:
- Click on "Circulation and Fine Rules" under the "Circulation and Fine Rules" section. Here, you can define circulation rules, loan periods, fine policies, and other circulation-related settings. Customize these rules based on your library's policies and requirements.
-
Set Up Patron Categories:
- Under the "Patrons and Circulation" section, click on "Patron Categories." Patron categories define the different types of library patrons (e.g., adult, child, staff). Create patron categories and customize their borrowing privileges, loan limits, and other settings.
-
Configure Authorized Values:
- Under the "Administration" section, click on "Authorized Values." Here, you can configure various controlled vocabularies used throughout Koha, such as shelving locations, material types, and more. Customize these authorized values to match your library's cataloging standards and practices.
-
Customize Notices and Slips:
- Under the "Tools" section, click on "Notices and Slips." Customize the email notices and print slips that Koha sends to patrons for various library transactions, such as checkouts, holds, and overdue reminders.
By following these steps, you can set up your library in Koha's staff interface and configure it according to your library's specific needs and requirements.
Configuring libraries and groups
Configuring libraries and groups in Koha allows you to define the organizational structure of your library system, including multiple branches and libraries within your network. Here's how you can configure libraries and groups in Koha:
-
Access Libraries and Groups Configuration: Under the "Library" section in the dropdown menu, click on "Libraries." This will take you to the Libraries and Groups page, where you can configure libraries and library groups.
-
Add Library Group (Optional): If your library system consists of multiple libraries grouped together, you can create a library group to represent this structure. To add a library group, click on the "Add New Group" button and enter the group's name and description.
-
Add Library: To add a new library or branch to your system, click on the "Add New Library" button. Fill in the required information, including the library's name, code, description, and address details. You can also assign the library to a group if applicable.
-
Edit or Delete Libraries: Once you've added libraries to your system, you can edit their details or delete them if necessary. Use the "Edit" and "Delete" buttons next to each library entry to make changes or remove libraries from your system.
-
Save Changes: After making any changes to libraries or groups, be sure to click the "Save Changes" button to apply your modifications.
-
Configure Branches and Locations: Within each library, you can further define branches and locations to represent physical or virtual collections within the library. You can access the branches and locations configuration by clicking on the "Branches and Locations" link next to each library entry.
Defining item types
Defining item types in Koha allows you to categorize and differentiate the various types of items in your library's collection, such as books, DVDs, CDs, etc. Each item type can have its own set of circulation rules, loan periods, and other attributes. Here's how you can define item types in Koha:
- Navigate to Administration: Click on the "Administration" tab in the top menu bar. This will open a dropdown menu with various administrative options.
-
Access Item Types Configuration: Under the "Catalog" section in the dropdown menu, click on "Item Types." This will take you to the Item Types page, where you can define and manage item types.
-
Add New Item Type: To add a new item type, click on the "New Item Type" button. This will open a form where you can enter the details of the new item type.
-
Enter Item Type Details: In the form for adding a new item type, fill in the following details:
- Name: Enter the name of the item type (e.g., Book, DVD, CD).
- Description: Optionally, provide a description of the item type.
- Max Issue Days: Set the maximum number of days that items of this type can be checked out.
- Not for Loan: Check this box if items of this type should not be available for loan.
- Fine Calculation: Specify how fines are calculated for items of this type (e.g., per day, per hour).
-
Save Item Type: After entering the details of the new item type, click the "Save" button to add it to your library's list of item types.
-
Edit or Delete Item Types: Once you've defined item types, you can edit their details or delete them if necessary. Use the "Edit" and "Delete" buttons next to each item type entry to make changes or remove item types from your system.
By following these steps, you can define item types in Koha to categorize and manage the different types of items in your library's collection effectively.
Configure Circulation and Fine Rules
Configuring circulation and fine rules in Koha allows you to define the borrowing policies and fine calculation methods for your library. Here's how you can configure circulation and fine rules in Koha:
- Navigate to Administration: Click on the "Administration" tab in the top menu bar. This will open a dropdown menu with various administrative options.
-
Access Circulation and Fine Rules Configuration: Under the "Circulation and Fine Rules" section in the dropdown menu, click on "Circulation and Fine Rules." This will take you to the Circulation and Fine Rules page, where you can configure circulation and fine-related settings.
-
Configure Circulation Rules:
- Click on the "Circulation Rules" tab to access the circulation rules configuration. Here, you can define rules for loan periods, renewals, holds, and more.
- For each rule type (e.g., loan periods, renewals), you can define different rules based on item type, patron category, and location. Click on the "Add Rule" button to create a new rule, and enter the rule details (e.g., duration, renewal limits) as needed.
-
Configure Fine Rules:
- Click on the "Fine Rules" tab to access the fine rules configuration. Here, you can define rules for fine calculation, maximum fines, grace periods, and more.
- Define how fines are calculated for overdue items (e.g., per day, per hour) and set the maximum fine amount that patrons can accrue. You can also configure grace periods to give patrons additional time before fines are applied.
-
Save Changes: After configuring circulation and fine rules, click the "Save Changes" button to apply your modifications.
By following these steps, you can configure circulation and fine rules in Koha to define borrowing policies and fine calculation methods that align with your library's requirements.
Setting up patron categories
Setting up patron categories in Koha allows you to define different types of library patrons and specify their borrowing privileges, loan limits, and other settings. Here's how you can set up patron categories in Koha:
- Navigate to Administration: Click on the "Administration" tab in the top menu bar. This will open a dropdown menu with various administrative options.
-
Access Patron Categories Configuration: Under the "Patrons and Circulation" section in the dropdown menu, click on "Patron Categories." This will take you to the Patron Categories page, where you can configure patron categories.
-
Add New Patron Category: To add a new patron category, click on the "New Patron Category" button. This will open a form where you can enter the details of the new patron category.
-
Enter Patron Category Details: In the form for adding a new patron category, fill in the following details:
- Name: Enter the name of the patron category (e.g., Adult, Child, Staff).
- Description: Optionally, provide a description of the patron category.
- Circulation Rules: Define the circulation rules for patrons in this category, including loan periods, renewal limits, and holds privileges.
- Fines and Fees: Specify the fine rules and fee policies for patrons in this category, including maximum fines, grace periods, and billing thresholds.
-
Save Patron Category: After entering the details of the new patron category, click the "Save" button to add it to your library's list of patron categories.
-
Edit or Delete Patron Categories: Once you've defined patron categories, you can edit their details or delete them if necessary. Use the "Edit" and "Delete" buttons next to each patron category entry to make changes or remove patron categories from your system.
By following these steps, you can set up patron categories in Koha to define different types of library patrons and specify their borrowing privileges and fine policies according to your library's requirements.
Configure Authorized Values
- Navigate to Administration: Click on the "Administration" tab in the top menu bar. This will open a dropdown menu with various administrative options.
-
Access Authorized Values Configuration: Under the "Administration" section in the dropdown menu, click on "Authorized Values." This will take you to the Authorized Values page, where you can configure controlled vocabularies for different attributes.
-
Select the Category: On the Authorized Values page, you'll see a list of authorized values categories. Each category represents a different attribute or aspect of your library's collection and operations. Click on the category you want to configure (e.g., shelving locations, material types, item statuses).
-
Add New Authorized Value: To add a new authorized value, click on the "Add Value" button next to the authorized values category. This will open a form where you can enter the details of the new authorized value.
-
Enter Details: In the form for adding a new authorized value, fill in the following details:
- Value: Enter the name or code of the authorized value (e.g., "Fiction," "DVDs," "Available").
- Description: Optionally, provide a description of the authorized value.
-
Save Authorized Value: After entering the details of the new authorized value, click the "Save" button to add it to the list of authorized values for the selected category.
- Important Authorized Values: Some authorized values are mostly important, like LOC, LOST, Withdrawn etc.
-
Edit or Delete Authorized Values: Once you've defined authorized values, you can edit their details or delete them if necessary. Use the "Edit" and "Delete" buttons next to each authorized value entry to make changes or remove authorized values from your system.
By following these steps, you can configure authorized values in Koha to define controlled vocabularies for various attributes and ensure consistency in cataloging and managing your library's collection.
Cataloguing
Cataloging using MARC21
Cataloging using MARC21 (Machine-Readable Cataloging) involves creating bibliographic records for library materials in a standardized format. MARC21 records include information about the title, author, publisher, publication date, physical description, subject headings, and more. Here's a general guide to cataloging using MARC21:
-
Access Cataloging Module: Log in to Koha's staff interface and access the cataloging module.
-
Create a New Record: Start by creating a new bibliographic record for the item you want to catalog. You can do this by clicking on the "New Record" or "New Item" button, depending on your workflow preferences.
- Enter Bibliographic Information: Enter bibliographic information about the item, including the title, author, publisher, publication date, edition, physical description, etc. Use the appropriate MARC21 fields to input each piece of information. Refer to the MARC21 documentation or guidelines for specific field codes and formatting rules.
-
Assign Subject Headings: Assign subject headings to describe the content of the item. Use controlled vocabularies such as Library of Congress Subject Headings (LCSH) or other authorized lists. Enter subject headings in the appropriate MARC21 fields (e.g., 650 for topical subjects).
-
Add Additional Details: Include any additional details about the item, such as notes, summaries, contents, series statements, etc. Use the appropriate MARC21 fields for each type of information.
-
Assign Call Number: Assign a call number to the item based on your library's classification system (e.g., Dewey Decimal Classification, Library of Congress Classification). Enter the call number in the appropriate MARC21 field (e.g., 050 for Library of Congress call numbers).
-
Save the Record: Once you've entered all relevant information, save the bibliographic record. Koha will validate the record to ensure it conforms to MARC21 standards.
-
Review and Edit: Review the cataloging record for accuracy and completeness. Make any necessary edits or corrections before finalizing the record.
-
Attach Items: If the bibliographic record represents a physical item in your collection, attach the item record to the bibliographic record. Enter item-specific details such as barcode, location, copy number, etc.
-
Cataloging-in-Process (CIP): If you're cataloging newly acquired materials that come with Cataloging-in-Process (CIP) records from the publisher, you can import the CIP record into Koha and then modify it as needed to reflect your library's standards and practices.
-
Save and Close: Once the cataloging process is complete, save the bibliographic record and close the cataloging module.
0xx
In MARC21 cataloging, there are several commonly used fields that contain essential bibliographic information about library materials. Here are some of the most frequently used MARC21 fields along with examples of their entries:
-
Leader Field (000):
- The Leader field contains control information about the record.
- Example: LDR 01001cam 2200289 4500
-
Control Number (001):
- A unique control number assigned to the record.
- Example: 001 123456789
- Physica Description fixed field: (007) The 007 field in MARC21 records contains fixed-length data elements that provide physical characteristics information about non-book materials. It is used for materials such as electronic resources, maps, visual materials, sound recordings, etc. Here are the essentials of the 007 field:
-
- Category of material (positions 00-00): Indicates the category of material being described, such as electronic resource, map, sound recording, etc. It uses a single-character code based on the MARC21 Category of Material Code List.
- Specific material designation (positions 01-01): Provides additional detail about the specific type of material being described. It uses a single-character code to specify specific material characteristics.
- Color (positions 02-03): Indicates the color characteristics of the resource, if applicable. It uses a two-character code based on the MARC21 Color Code List.
- Dimensions (positions 04-07): Specifies the dimensions or size of the resource, such as height and width. It uses four characters to represent the dimensions in centimeters.
- Sound characteristics (positions 08-10): Describes the sound characteristics of the resource, if applicable. It uses a three-character code based on the MARC21 Sound Characteristics Code List.
- Image bit depth (positions 11-12): Indicates the bit depth of the image for visual materials, if applicable. It uses a two-character code to represent the number of bits per pixel.
- File formats (positions 13-15): Specifies the file formats for electronic resources, if applicable. It uses a three-character code to represent the file formats.
- Quality assurance target(s) (positions 16-17): Indicates the quality assurance target(s) for the resource, if applicable. It uses a two-character code based on the MARC21 Quality Assurance Targets Code List.
- Antecedent/source (positions 18-19): Describes the relationship of the resource to an antecedent or source, if applicable. It uses a two-character code to specify the relationship.
These elements in the 007 field provide detailed physical characteristics information about non-book materials, facilitating accurate description and classification of various types of materials in library collections.
-
Fixed-lenght data elements: (008) The 008 field in MARC21 records contains fixed-length data elements that provide essential information about the bibliographic record as a whole. Here are the essentials of the 008 field:
- Date of publication (positions 07-10): Indicates the date of publication of the resource. It includes the year or range of years for resources published within a specific time frame.
- Country of publication (positions 15-17): Specifies the country of publication using a three-character code based on the MARC Code List for Countries.
- Illustrations (position 18): Indicates whether the resource contains illustrations. It uses a single-character code to specify the presence and nature of illustrations in the resource.
- Audience (positions 22-23): Specifies the target audience for the resource, such as general, juvenile, or specialized. It uses two characters based on the MARC21 Target Audience Code List.
- Type of material (position 23): Indicates the type of material being described (e.g., book, computer file, map, etc.). It uses a single-character code based on the MARC21 Type of Material Code List.
- Government publication (position 28): Indicates whether the resource is a government publication. It uses a single-character code to denote various types of government publications.
- Literary form (position 33): Specified whether it is fiction, essay or other form of literary.
- Biography (position 34): Indicates whether the resource is a biography. It uses a single-character code to specify if the item is a biography or not.
- Language (position 35-37): Specifies the primary language of the resource using a three-character code based on the MARC Code List for Languages.
These are the essential elements of the 008 field in MARC21 records, providing important information about the resource's publication details, language, type, and other characteristics. These elements help libraries and catalogers to accurately describe and classify bibliographic resources.
- ISBN (020):
- International Standard Book Number for the item.
- Example: 020 $a9780306406157
- ISSN (022):
- International Standard Serial Number for the item.
- Example: 02003064
- Source of Acquisition (037):
- Subfield $a: Vendor X (Source from which the item was acquired)
- Subfield $b: 12345 (Stock number associated with the acquisition source)
- Subfield $c: Purchased (Acquisition status of the item)
- Subfield $d: Purchase (Method by which the item was acquired)
- Subfield $e: 2023-03-01 (Date when the item was acquired)
- Subfield $f: Main Library (Ownership of the item)
- Language (041):
- Language code(s) of the item.
- Example: 041 0 $aeng $bfre $gspa
- Dewey Decimal Classification (082): Classification number according to the Dewey Decimal Classification system.
-
Subfield $a: Dewey Decimal Number
- Sample Value: 813.54
- Description: Represents the primary classification number assigned to the item based on the Dewey Decimal Classification system.
-
Subfield $b: Item Number / Author Marc
- Sample Value: N419a
- Description: Author Mark as per sunborn cutter figure
-
Subfield $c: Edition Number
- Sample Value: 23
- Description: Indicates the edition number of the Dewey Decimal Classification system used to assign the classification number.
-
1xx
The 1XX fields in MARC21 records primarily contain information about the main entry, which typically represents the primary creator or contributor of the bibliographic resource. Here's a breakdown of the 1XX fields with subfields commonly used along with an example:
- 100 - Main Entry-Personal Name:
- Indicators: Indicator 1 specifies whether the personal name is established in the Library of Congress Name Authority File (value "0") or not established (value "1").
- Subfield $a: Personal name (Example: Rowling, J.K.)
- Subfield $b: Numeration (Example: III)
- Subfield $c: Titles and other words associated with a name (Example: Sir)
- 110 - Main Entry-Corporate Name:
- Indicators: Indicator 1 specifies whether the corporate name is established in the Library of Congress Name Authority File (value "0") or not established (value "1").
- Subfield $a: Corporate name (Example: Library of Congress)
- Subfield $b: Subordinate unit (Example: Cataloging Policy and Support Office)
- 111 - Main Entry-Meeting Name:
- Indicators: Indicator 1 specifies whether the meeting name is established in the Library of Congress Name Authority File (value "0") or not established (value "1").
- Subfield $a: Meeting name (Example: International Conference on Machine Learning)
- Subfield $n: Numbering (Example: 28th)
- Subfield $d: Date of meeting (Example: 2021)
- Subfield $c: Location of meeting (Example: New York, N.Y.)
- 130 - Main Entry-Uniform Title:
- Indicators: Indicator 1 specifies whether the uniform title is established in the Library of Congress Name Authority File (value "0") or not established (value "1").
- Subfield $a: Uniform title (Example: Bible. New Testament. Greek)
2xx
The essential 2XX fields commonly used in MARC21 records with their respective indicators, subfields, descriptions, and examples:
-
200 - Title Proper:
- Indicators: Both indicators are typically undefined or contain blank values.
- Subfield $a: Title proper (Example: Harry Potter and the Sorcerer's Stone)
- Subfield $b: Remainder of title (Example: Part 1)
- Subfield $f: Date of a work (Example: 1997)
- Subfield $g: Miscellaneous information (Example: Audiobook version)
- Subfield $h: Medium (Example: Sound recording)
-
210 - Abbreviated Title:
- Indicators: Both indicators are typically undefined or contain blank values.
- Subfield $a: Abbreviated title (Example: HPSS)
-
222 - Key Title:
- Indicators: Indicator 1 is typically set to "0" (used) and indicator 2 is undefined.
- Subfield $a: Key title (Example: Proceedings of the International Conference on Machine Learning)
-
240 - Uniform Title:
- Indicators: Both indicators are typically undefined or contain blank values.
- Subfield $a: Uniform title (Example: Bible. New Testament. Greek)
-
242 - Translation of Title:
- Indicators: Indicator 1 is typically set to "0" (used) and indicator 2 is undefined.
- Subfield $a: Title proper (Example: Harry Potter and the Philosopher's Stone)
- Subfield $b: Remainder of title (Example: Part 1)
- Subfield $n: Number of part/section (Example: Book 1)
-
245 - Title Statement:
- Indicators: Indicator 1 is typically set to "1" (title added entry) or "0" (no added entry). Indicator 2 depends on whether the title is intended to be displayed in a non-filing position.
- Subfield $a: Title proper (Example: Harry Potter and the Sorcerer's Stone)
- Subfield $b: Remainder of title (Example: Part 1)
- Subfield $c: Statement of responsibility (Example: J.K. Rowling)
-
246 - Varying Form of Title:
- Indicators: Indicator 1 is typically set to "3" (title added entry) or "0" (no added entry). Indicator 2 depends on whether the title is intended to be displayed in a non-filing position.
- Subfield $a: Title proper (Example: Sorcerer's Stone)
-
247 - Former Title:
- Indicators: Indicator 1 is typically set to "0" (used) and indicator 2 is undefined.
- Subfield $a: Title proper (Example: Harry Potter and the Philosopher's Stone)
-
250 - Edition Statement:
- Indicators: Both indicators are typically undefined or contain blank values.
- Subfield $a: Edition statement (Example: First American edition)
-
254 - Musical Presentation Statement:
- Indicators: Both indicators are typically undefined or contain blank values.
- Subfield $a: Musical presentation statement (Example: Solo version)
3xx
The essential 3XX fields commonly used in MARC21 records with their respective indicators, subfields, descriptions, and examples:
-
300 - Physical Description:
- Indicators: Indicator 1 specifies whether the physical description is formatted according to ISBD (International Standard Bibliographic Description) conventions.
- Subfield $a: Extent (Example: 356 pages)
- Subfield $b: Other physical details (Example: illustrations)
- Subfield $c: Dimensions (Example: 23 cm)
-
336 - Content Type:
- Indicators: Both indicators are typically undefined or contain blank values.
- Subfield $a: Content type term (Example: text)
- Subfield $b: Content type code (Example: txt)
-
337 - Media Type:
- Indicators: Both indicators are typically undefined or contain blank values.
- Subfield $a: Media type term (Example: unmediated)
- Subfield $b: Media type code (Example: n)
-
338 - Carrier Type:
- Indicators: Both indicators are typically undefined or contain blank values.
- Subfield $a: Carrier type term (Example: volume)
- Subfield $b: Carrier type code (Example: nc)
-
340 - Physical Medium:
- Indicators: Both indicators are typically undefined or contain blank values.
- Subfield $a: Material base and configuration (Example: microfilm reel)
- Subfield $b: Dimensions (Example: 16 mm)
-
347 - Digital File Characteristics:
- Indicators: Both indicators are typically undefined or contain blank values.
- Subfield $a: File type (Example: PDF)
- Subfield $b: Encoding format (Example: application/pdf)
-
380 - Form of Work:
- Indicators: Both indicators are typically undefined or contain blank values.
- Subfield $a: Form of work term (Example: novel)
- Subfield $b: Form of work code (Example: a)
-
384 - Medium of Performance:
- Indicators: Both indicators are typically undefined or contain blank values.
- Subfield $a: Instrumentation (Example: piano)
- Subfield $b: Numeric designation of soloist/performer (Example: 1)
-
500 - General Note:
- Indicators: Indicator 1 specifies whether the note is linked to the title (value "0") or not (value "1").
- Subfield $a: Note text (Example: Includes bibliographical references)
-
505 - Contents Note:
- Indicators: Indicator 1 specifies whether the note is linked to the title (value "0") or not (value "1").
- Subfield $a: Contents note text (Example: Chapter 1: Introduction)
4xx
The essential 4XX fields commonly used in MARC21 records with their respective indicators, subfields, descriptions, and examples:
-
400 - Series Statement/Added Entry-Personal Name:
- Indicators: Indicator 1 specifies whether the series statement is traced (value "0") or not traced (value "1").
- Subfield $a: Personal name (Example: Rowling, J.K.)
-
410 - Series Statement/Added Entry-Corporate Name:
- Indicators: Indicator 1 specifies whether the series statement is traced (value "0") or not traced (value "1").
- Subfield $a: Corporate name (Example: Library of Congress)
-
411 - Series Statement/Added Entry-Meeting Name:
- Indicators: Indicator 1 specifies whether the series statement is traced (value "0") or not traced (value "1").
- Subfield $a: Meeting name (Example: International Conference on Machine Learning)
-
440 - Series Statement/Added Entry-Title:
- Indicators: Indicator 1 specifies whether the series statement is traced (value "0") or not traced (value "1").
- Subfield $a: Title (Example: Harry Potter Series)
-
490 - Series Statement:
- Indicators: Indicator 1 specifies whether the series statement is traced (value "0") or not traced (value "1").
- Subfield $a: Series statement (Example: The Chronicles of Narnia)
-
500 - General Note:
- Indicators: Indicator 1 specifies whether the note is linked to the title (value "0") or not (value "1").
- Subfield $a: Note text (Example: Includes bibliographical references)
-
505 - Contents Note:
- Indicators: Indicator 1 specifies whether the note is linked to the title (value "0") or not (value "1").
- Subfield $a: Contents note text (Example: Chapter 1: Introduction)
-
520 - Summary, Etc.:
- Indicators: Both indicators are typically undefined or contain blank values.
- Subfield $a: Summary text (Example: This book follows the journey of a young wizard, Harry Potter, as he attends Hogwarts School of Witchcraft and Wizardry.)
-
546 - Language Note:
- Indicators: Indicator 1 specifies whether the note is linked to the title (value "0") or not (value "1").
- Subfield $a: Language note text (Example: In English)
-
590 - Local Note:
- Indicators: Both indicators are typically undefined or contain blank values.
- Subfield $a: Local note text (Example: Gift of the author)
5xx
The essential 5XX fields commonly used in MARC21 records with their respective indicators, subfields, descriptions, and examples:
-
500 - General Note:
- Indicators: Indicator 1 specifies whether the note is linked to the title (value "0") or not (value "1").
- Subfield $a: Note text (Example: Includes bibliographical references)
-
505 - Contents Note:
- Indicators: Indicator 1 specifies whether the note is linked to the title (value "0") or not (value "1").
- Subfield $a: Contents note text (Example: Chapter 1: Introduction)
-
520 - Summary, Etc.:
- Indicators: Both indicators are typically undefined or contain blank values.
- Subfield $a: Summary text (Example: This book follows the journey of a young wizard, Harry Potter, as he attends Hogwarts School of Witchcraft and Wizardry.)
-
546 - Language Note:
- Indicators: Indicator 1 specifies whether the note is linked to the title (value "0") or not (value "1").
- Subfield $a: Language note text (Example: In English)
-
590 - Local Note:
- Indicators: Both indicators are typically undefined or contain blank values.
- Subfield $a: Local note text (Example: Gift of the author)
-
500 - General Note:
- Indicators: Indicator 1 specifies whether the note is linked to the title (value "0") or not (value "1").
- Subfield $a: Note text (Example: Includes bibliographical references)
-
505 - Contents Note:
- Indicators: Indicator 1 specifies whether the note is linked to the title (value "0") or not (value "1").
- Subfield $a: Contents note text (Example: Chapter 1: Introduction)
-
520 - Summary, Etc.:
- Indicators: Both indicators are typically undefined or contain blank values.
- Subfield $a: Summary text (Example: This book follows the journey of a young wizard, Harry Potter, as he attends Hogwarts School of Witchcraft and Wizardry.)
-
546 - Language Note:
- Indicators: Indicator 1 specifies whether the note is linked to the title (value "0") or not (value "1").
- Subfield $a: Language note text (Example: In English)
-
590 - Local Note:
- Indicators: Both indicators are typically undefined or contain blank values.
- Subfield $a: Local note text (Example: Gift of the author)
6xx
The essential 6XX fields commonly used in MARC21 records with their respective indicators, subfields, descriptions, and examples:
-
600 - Subject Added Entry-Personal Name:
- Indicators: Indicator 1 specifies whether the personal name is established in the Library of Congress Name Authority File (value "0") or not established (value "1").
- Subfield $a: Personal name (Example: Rowling, J.K.)
- Subfield $b: Numeration (Example: III)
- Subfield $c: Titles and other words associated with a name (Example: Sir)
-
610 - Subject Added Entry-Corporate Name:
- Indicators: Indicator 1 specifies whether the corporate name is established in the Library of Congress Name Authority File (value "0") or not established (value "1").
- Subfield $a: Corporate name (Example: Library of Congress)
- Subfield $b: Subordinate unit (Example: Cataloging Policy and Support Office)
- Subfield $n: Meeting name or jurisdiction name as entry element (Example: (28th : 2021 : New York, N.Y.))
-
611 - Subject Added Entry-Meeting Name:
- Indicators: Indicator 1 specifies whether the meeting name is established in the Library of Congress Name Authority File (value "0") or not established (value "1").
- Subfield $a: Meeting name (Example: International Conference on Machine Learning)
- Subfield $n: Numbering (Example: 28th)
- Subfield $d: Date of meeting (Example: 2021)
- Subfield $c: Location of meeting (Example: New York, N.Y.)
-
630 - Subject Added Entry-Uniform Title:
- Indicators: Indicator 1 specifies whether the uniform title is established in the Library of Congress Name Authority File (value "0") or not established (value "1").
- Subfield $a: Uniform title (Example: Bible. New Testament. Greek)
- Subfield $v: Form subdivision (Example: Commentaries)
-
650 - Subject Added Entry-Topical Term:
- Indicators: Indicator 1 specifies whether the term is established in the Library of Congress Subject Headings (value "0") or not established (value "1").
- Subfield $a: Topical term (Example: Wizards)
- Subfield $x: General subdivision (Example: History)
- Subfield $z: Geographic subdivision (Example: England)
-
651 - Subject Added Entry-Geographic Name:
- Indicators: Indicator 1 specifies whether the name is established in the Library of Congress Subject Headings (value "0") or not established (value "1").
- Subfield $a: Geographic name (Example: England)
- Subfield $v: Form subdivision (Example: Maps)
- Subfield $x: General subdivision (Example: History)
-
653 - Index Term-Uncontrolled:
- Indicators: Both indicators are typically undefined or contain blank values.
- Subfield $a: Uncontrolled term (Example: Magic)
- Subfield $2: Source of term (Example: LCSH)
-
655 - Index Term-Genre/Form:
- Indicators: Both indicators are typically undefined or contain blank values.
- Subfield $a: Genre/form term (Example: Fantasy fiction)
- Subfield $v: Form subdivision (Example: Juvenile literature)
-
656 - Index Term-Occupation:
- Indicators: Both indicators are typically undefined or contain blank values.
- Subfield $a: Occupation term (Example: Wizards)
- Subfield $v: Form subdivision (Example: Fiction)
-
657 - Index Term-Function:
- Indicators: Both indicators are typically undefined or contain blank values.
- Subfield $a: Function term (Example: Education)
- Subfield $v: Form subdivision (Example: Evaluation)
7xx
The essential 7XX fields commonly used in MARC21 records with their respective indicators, subfields, descriptions, and examples:
-
700 - Added Entry-Personal Name:
- Indicators: Indicator 1 specifies whether the personal name is established in the Library of Congress Name Authority File (value "0") or not established (value "1").
- Subfield $a: Personal name (Example: Rowling, J.K.)
- Subfield $b: Numeration (Example: III)
- Subfield $c: Titles and other words associated with a name (Example: Sir)
-
710 - Added Entry-Corporate Name:
- Indicators: Indicator 1 specifies whether the corporate name is established in the Library of Congress Name Authority File (value "0") or not established (value "1").
- Subfield $a: Corporate name (Example: Library of Congress)
- Subfield $b: Subordinate unit (Example: Cataloging Policy and Support Office)
-
711 - Added Entry-Meeting Name:
- Indicators: Indicator 1 specifies whether the meeting name is established in the Library of Congress Name Authority File (value "0") or not established (value "1").
- Subfield $a: Meeting name (Example: International Conference on Machine Learning)
- Subfield $n: Numbering (Example: 28th)
- Subfield $d: Date of meeting (Example: 2021)
- Subfield $c: Location of meeting (Example: New York, N.Y.)
-
720 - Added Entry-Uncontrolled Name:
- Indicators: Both indicators are typically undefined or contain blank values.
- Subfield $a: Uncontrolled name (Example: Harry Potter Fan Club)
-
730 - Added Entry-Uniform Title:
- Indicators: Indicator 1 specifies whether the uniform title is established in the Library of Congress Name Authority File (value "0") or not established (value "1").
- Subfield $a: Uniform title (Example: Bible. New Testament. Greek)
-
740 - Added Entry-Uncontrolled Related/Analytical Title:
- Indicators: Indicator 1 specifies whether the title is traced (value "0") or not traced (value "1").
- Subfield $a: Uncontrolled title (Example: Harry Potter Illustrated Edition)
-
751 - Added Entry-Geographic Name:
- Indicators: Both indicators are typically undefined or contain blank values.
- Subfield $a: Geographic name (Example: Hogwarts School of Witchcraft and Wizardry)
-
752 - Added Entry-Hierarchical Place Name:
- Indicators: Both indicators are typically undefined or contain blank values.
- Subfield $a: Country or larger entity (Example: United States)
- Subfield $b: First-order political jurisdiction (Example: New York)
- Subfield $c: Intermediate political jurisdiction (Example: New York County)
-
753 - System Details Access to Computer Files:
- Indicators: Both indicators are typically undefined or contain blank values.
- Subfield $a: Make and model of machine (Example: Dell Inspiron)
- Subfield $b: Programming language (Example: Python)
-
754 - Added Entry-Taxonomic Identification:
- Indicators: Both indicators are typically undefined or contain blank values.
- Subfield $a: Taxonomic name (Example: Canis lupus)
- Subfield $c: Taxonomic category (Example: species)
8xx
the essential 8XX fields commonly used in MARC21 records with their respective indicators, subfields, descriptions, and examples:
-
800 - Series Added Entry-Personal Name:
- Indicators: Indicator 1 specifies whether the personal name is established in the Library of Congress Name Authority File (value "0") or not established (value "1").
- Subfield $a: Personal name (Example: Rowling, J.K.)
- Subfield $b: Numeration (Example: III)
- Subfield $c: Titles and other words associated with a name (Example: Sir)
-
810 - Series Added Entry-Corporate Name:
- Indicators: Indicator 1 specifies whether the corporate name is established in the Library of Congress Name Authority File (value "0") or not established (value "1").
- Subfield $a: Corporate name (Example: Library of Congress)
- Subfield $b: Subordinate unit (Example: Cataloging Policy and Support Office)
-
811 - Series Added Entry-Meeting Name:
- Indicators: Indicator 1 specifies whether the meeting name is established in the Library of Congress Name Authority File (value "0") or not established (value "1").
- Subfield $a: Meeting name (Example: International Conference on Machine Learning)
- Subfield $n: Numbering (Example: 28th)
- Subfield $d: Date of meeting (Example: 2021)
- Subfield $c: Location of meeting (Example: New York, N.Y.)
-
830 - Series Added Entry-Uniform Title:
- Indicators: Indicator 1 specifies whether the uniform title is established in the Library of Congress Name Authority File (value "0") or not established (value "1").
- Subfield $a: Uniform title (Example: Bible. New Testament. Greek)
-
841 - Holdings Coded Data Values:
- Indicators: Both indicators are typically undefined or contain blank values.
- Subfield $a: Holdings code (Example: 12345)
- Subfield $b: Summary holdings (Example: Vol. 1-10)
-
856 - Electronic Location and Access:
- Indicators: Indicator 1 specifies whether the electronic resource is available (value "4") or not available (value "8").
- Subfield $u: Uniform Resource Identifier (Example: http://www.example.com)
- Subfield $z: Public note (Example: Access may be restricted)
-
880 - Alternate Graphic Representation:
- Indicators: Both indicators are typically undefined or contain blank values.
- Subfield $6: Linkage (Example: 880-01)
- Subfield $a: Alternate graphic representation (Example: 珠玉在侧)
9xx
The 942 field in MARC21 records is used for holdings information specific to the local institution. It typically contains data related to the item's location, call number, and other holdings-related details. Here's an overview of the subfields commonly found in the 942 field:
- Subfield $a: Location - Specifies the location of the item within the institution.
- Subfield $b: Sub-location - Provides additional information about the specific area or section within the location.
- Subfield $c: Call number prefix - Indicates any prefix associated with the call number assigned to the item.
- Subfield $d: Call number suffix - Specifies any suffix added to the call number.
- Subfield $h: Shelving scheme - Describes the shelving scheme used for organizing items in the location.
- Subfield $i: Item type - Indicates the type of item, such as book, periodical, DVD, etc.
- Subfield $l: Circulation modifier - Specifies any circulation restrictions or modifiers associated with the item.
- Subfield $m: Materials specified - Provides details about the material or format of the item, such as microfilm, CD-ROM, etc.
- Subfield $n: Not for loan - Indicates whether the item is available for loan or not.
- Subfield $o: Item enumeration and chronology - Specifies enumeration or chronology information associated with the item.
- Subfield $p: Piece designation - Provides a piece designation or identifier for multi-piece items.
- Subfield $x: Non-public note - Contains non-public notes or comments related to the item.
- Subfield $z: Public note - Contains public notes or comments related to the item.
Example:
- Location: Main Library, General Stacks
- Call number: FIC (fiction section)
- Shelving scheme: LC (Library of Congress Classification)
- Item type: Book
- Circulation: Not for loan
- Materials: Print
- Public note: Do not remove from library
Item fields
The 952 field in MARC21 records is used for location and item information, particularly for holding libraries. Here's an overview of the subfields commonly found in the 952 field:
- Subfield $0: Control subfield (Not withdrawn): Indicates that the item has not been withdrawn from the collection.
- Subfield $3: Materials specified: Indicates specific materials, such as bound volumes or other parts.
- Subfield $4: Not damaged: Indicates whether the item is damaged or not.
- Subfield $7: Not for loan: Indicates whether the item is available for loan.
- Subfield $8: Collection code: Specifies the collection code, often used to categorize items.
- Subfield $a: Home library: Specifies the home library or main library where the item is located.
- Subfield $b: Current location: Specifies the current location within the library.
- Subfield $c: Shelving location: Specifies the shelving location within the library.
- Subfield $d: Acquisition date: Indicates the date when the item was acquired by the library.
- Subfield $e: Source of accession: Specifies the source from which the item was acquired, such as purchased, donated, etc.
- Subfield $g: Cost, normal purchase price: Specifies the cost or normal purchase price of the item.
- Subfield $h: Enumeration and chronology: Provides enumeration or chronology information for the item.
- Subfield $o: Full call number: Specifies the full call number assigned to the item.
- Subfield $p: Barcode: Specifies the barcode number assigned to the item.
- Subfield $t: Copy number: Specifies the copy number of the item, distinguishing between multiple copies.
- Subfield $x: Non-public note: Contains non-public notes or comments related to the item.
- Subfield $z: Public note: Contains public notes or comments related to the item.
Example:
- Home library: Main Library
- Current location: General Stacks
- Shelving location: FIC (Fiction section)
- Acquisition date: February 15, 2023
- Source of accession: Purchased
- Cost: $29.99
- Enumeration and chronology: Volume 1
- Full call number: NF 456
- Barcode: 135792468
- Copy number: 1
- Non-public note: Clue page number is 45
- Public note: Do not move
Recommended
|
Tags |
Tag field |
Field |
Have to do |
Remarks |
|
020 |
INTERNATIONAL STANDARD BOOK NUMBER |
a-International Standard Book Number |
Both 13and 10digit (separately) |
(-)no need |
|
022 |
INTERNATIONAL STANDARD SERIAL NUMBER |
a-International Standard Serial Number |
8 digit |
(-)no need |
|
040 |
CATALOGING SOURCE |
a-Original cataloging agency c-Transcribing agency d-Modifying agency |
a-a-BD a-BD-DhTl or cataloguing agency c-BD-DhTl or cataloguing agency d- BD-DhTl (if modified) |
|
|
041 |
LANGUAGE CODE |
a-Language code of text/sound track or separate title |
a-select English or Bengali |
|
|
082 |
DEWEY DECIMAL CLASSIFICATION NUMBER |
2-Edition number a-Classification number b- item number |
2-23 a-658.8 b-KOM 2012 |
NB: b- Author marks copyright year or latest publication year |
|
100 |
MAIN ENTRY -PERSONAL NUMBER |
a-Personal name |
i.e. Kotler, Philip, P. |
Surname space first name(write 1 in the first blank box due to reverse) |
|
110 |
MAIN ENTRY-CORPORATE NAME |
a-Corporate name or jurisdiction name as entry element |
i.e. a-Ministry of finance i.e. b-Statistical Department |
|
|
245 |
TITLE STATEMENT |
a-Title b-remainder of title c- Statement of responsibility, etc. |
a-title b-subtitle c-editor |
(write in the first blank box due to author & 0 without article or 2/3/4 due to article in the 2nd box) |
|
250 |
EDITION STATEMENT |
a-Edition statement |
i.e. a-3rd ed. |
|
|
260 |
PUBLICATION DISTRIBUTION,ETC(IMPRINT) |
a-Place of publication, distribution , etc. b-Name of publisher, distributor, etc. c-Date of publication, distribution, etc. |
|
See library of congress online catalogue |
|
300 |
PHYSICAL DESORIPTION |
a-Extent b-Other physical details c-Dimensions |
a-Pagination b-Illustration c-cm |
i.e. Xi, 560 p.: |
|
440 |
SERIES STATEMENT/ADDED ENTRY-TITLE |
a-Title |
i.e. marketing management |
See library of congress online catalogue |
|
500 |
GENERAL NOTE |
a-General note |
i.e. Includes Index |
See library of congress online catalogue |
|
504 |
BIBLIOGRAPHY, ETC. NOTE |
a-Bibliography , etc. |
i.e. Includes bibliographical references. |
i.e. includes bibliographical reference and index |
|
590 |
LOCAL NOTE (RLIN) |
a-Name of cataloguer |
i.e. Md. Mubassir Ahsan |
|
|
650 |
SUBJECT ADDED ENTRY- TOPICAL TERM |
2-Source of heading or term a-tropical term or geographic name as entry element v-Form subdivision y-Chronological subdivision |
|
a-i.e. marketing a-i.e. management v-i.e. marketing-dictionary x-i.e. marketing-theory v-i.e. marketing Bangladesh-1947-1971 |
|
651 |
SUBJECT ADDED ENTRY- GEOGRAPHIC NAME |
a-Geographic name |
a-Name Of A Country |
i.e. Bangladesh /India |
|
653 |
INDEX TERM-UNCONTROLLED |
a-Uncontrolled term |
a- English subject heading of Bengali book |
Subject heading without sears list |
|
700 |
ADDED ENTRY- PERSONAL NAME |
a-Personal name |
Rest of the authors one by one without first author in case of more than one author |
I.e. Kotler, Philip, P. NB: write 1 in the first box [1]for each entry |
|
710 |
ADDED ENTRY CORPORATE- NAME |
a-Corporate name or jurisdiction name as entry element b-Subordinate unit |
i.e. a- Ministry of finance, India i.e. b-statistical department |
|
|
856 |
ELECTRONIC LOCATION AND ACCESS |
3-Materials specified u-Uniform resource |
i.e. a-Table Of Contents |
i.e. Bibliographical information i.e. Publisher description |
|
942 |
ADDED ENTRY ELEMENTS (KOHA) |
2-Source of classification or shelving scheme c-KOHA [default] item type |
2-DDC c-Books/CD/ |
|
Item Entry Fields
|
Tag |
Field |
Have to do |
Remarks |
|
2 |
Source of classification or shelving location |
Select Dewey decimal classification |
|
|
7 |
Not for loan |
Select not for loan |
One copy from each title (confined) |
|
a |
Permanent location |
TL Library |
|
|
b |
Current location |
TL Library |
|
|
c |
Shelving location |
General stacks |
|
|
d |
Date acquired |
1012-05-10 |
Date of acquisition |
|
e |
Source of acquisition |
Pearson/Asia Foundation |
Name of book supplier |
|
g |
Cost normal purchase price |
950 |
Price of BD taka |
|
v |
Replacement Price |
|
|
|
h |
Serial enumeration/chronology |
1 |
Volume number |
|
o |
Full call number |
658.8 KOM 2012 |
|
|
p |
barcode |
Accession number |
|
|
y |
Koha item type |
Select book /cd/reference |
|
Label and Barcode Printing
- Navigate to Cataloging Module: Find and click "Cataloging".
- Create Label Batch: Look for "Create Label Batch".
- Enter Barcodes: Input or scan item barcodes.
- Choose Label Format: Select label template.
- Customize Options: Adjust printing settings.
- Preview Labels: Check the preview.
- Print Labels: Send to printer.
- Review: Verify printed labels.
- Distribute: Attach labels to items.
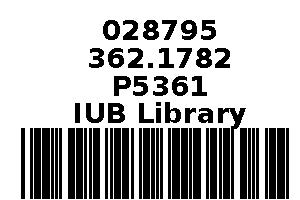
Barcode Layout 1.5x1
Example layout for spine label printing from Koha label printing:
Layout Name: Barcode Layout 1.5x1
Barcode Type (Encoding): Code 39
Layout Type: Bibliographic data precedes barcode
Bibliographic Data to Print:
- Barcode
- Item Call Number
- Branch Notes
Order of Text Fields to Print: Barcode, Item Call Number, Branch Notes
Draw Guide Boxes: Enabled
Split Call Numbers: Not specified
Text Justification: Centered
Font: Helvetica-Bold
Font Size: 10
Oblique Title: Tick
This layout configuration will generate barcode labels with bibliographic data preceding the barcode, including the barcode itself, the item call number, and any branch notes. The labels will be centered, using Helvetica-Bold font with a size of 10. Guide boxes will be drawn to assist with label alignment.
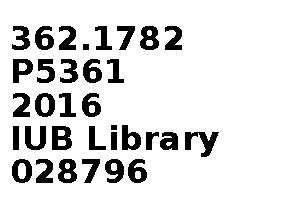
Spine Label Layout 1.5x1
Example layout for spine label printing from Koha label printing:
Layout Name: Spine Layout 1.5x1
Barcode Type (Encoding): Code 39
Layout Type: Only the bibliographic data is printed
Bibliographic Data to Print:
- Item Call Number
- Enumchron
- Branch Notes
- Barcode
Order of Text Fields to Print: Item Call Number, Enumchron, Branch Notes, Barcode
Draw Guide Boxes: Enabled
Split Call Numbers: Not specified
Text Justification: Left
Font: Helvetica-Bold
Font Size: 12
Oblique Title: tick
This layout configuration will generate spine labels with only the bibliographic data printed, including the item call number, enumchron, branch notes, and barcode. The text will be left-justified, using Helvetica-Bold font with a size of 12. Guide boxes will be drawn to assist with label alignment.
Example of spine label and barcode
Circulation
- Navigate to Circulation Desk: Find "Circulation" or "Check Out" option.
-
Check Out Items: Scan or enter item barcode, then patron barcode.
-
Check In Items: Scan or enter item barcode at check-in desk.
-
Renew Items: Select item(s) from patron's record and renew.
-
Place Holds: Search for item, click "Place Hold," select patron.
-
Handle Fines: Koha calculates fines for overdue items.
-
View Reports: Access circulation reports for statistics.
-
Manage Patron Accounts: Update patron information and view history.
-
Special Circumstances: Handle inter-library loans, suspensions, etc.
Checkout
- Scan or Enter Patron Barcode: Scan the barcode on the patron's library card or manually enter their patron barcode into the system.
- Scan or Enter Item Barcode: Scan the barcode of the item that a patron wants to check out. If you don't have a barcode scanner, you can manually enter the item's barcode into the system.
- Confirm Checkout: Once both the item and patron barcodes are entered, Koha will confirm the checkout transaction and update the item's status to "Checked Out" in the system. If there are any issues, such as an item being on hold for another patron or being overdue, Koha will alert you.
-
Optional: Confirm Due Date and Checkout Details: Koha may display the due date for the item being checked out and other relevant details about the transaction. Review this information to ensure accuracy.
-
Complete Transaction: If everything is correct, complete the checkout transaction. The item is now officially checked out to the patron, and they can take it home.
-
Repeat as Necessary: Continue checking out items for the patron by scanning or entering additional item barcodes. Repeat the process for each item they wish to borrow.
-
Communicate Checkout Details (Optional): If desired, you can communicate the checkout details to the patron, such as the due date for returning the items.
- Print Slips: Enter blank to print patron checkout slip.
Checkin
-
Access "Check In" Option: Look for the "Check In" option in the main search bar of the Koha Staff Interface.
-
Scan or Enter Item Barcode: Scan the barcode of the item that a patron is returning, or manually enter the item's barcode into the system if a scanner is not available.
-
Review Item Details: Koha will display information about the item being checked in, including its title, due date, and borrower information. Review this information to ensure accuracy.
-
Confirm Check-in: Once you've reviewed the item details and confirmed that it is being returned, proceed with the check-in process. Koha will update the item's status to "Available" in the system.
-
Process Additional Items: If the patron is returning multiple items, repeat the check-in process for each item by scanning or entering their barcodes.
-
Handle Any Issues: If there are any issues with the returned items, such as damage or missing parts, make notes in Koha or take further action as needed.
-
Communicate Check-in Details (Optional): If desired, communicate the check-in details to the patron, such as confirming that their items have been successfully returned.
-
Update Patron Records (Optional): Koha will automatically update the patron's borrowing record to reflect the returned items, including any outstanding fines or holds associated with them.
-
Print Slips (Optional): Optionally, you can print patron checkout slips by entering "blank" in the designated field.
Renew
other way:
User Management
-
Access Koha Staff Interface: Log in with your staff credentials.
-
Navigate to Patron Management: Look for the section labeled "Patrons" or "Patron Management."
-
Add New Patron/User: Click on "Add Patron" or similar. Fill in required information like name, address, contact details. Assign a username and password if needed. Set preferences.
-
Edit Existing Patrons/Users: Use the search feature to find a patron. Click their name to view details. Make necessary changes.
-
Delete Patrons/Users: Locate the delete option, select patrons, and confirm deletion.
-
Manage Borrowing Privileges: Adjust loan periods, borrowing limits, and restrictions based on library policies.
-
View Patron/User Activity: Track borrowing history, fines, holds, and other activities.
-
Save Changes: Ensure to save any modifications made to patron records.
-
Communicate with Patrons: Utilize features for sending notifications or emails regarding overdue notices, hold pickups, or announcements.
Add New Patron/User
Edit Patron/User
Import Patron/User
-
Prepare the CSV File: Make sure your CSV file contains the necessary information for the patrons you want to import. This typically includes fields such as name, address, email, and any other relevant information. Ensure that the CSV file is formatted correctly with each field separated by commas or semicolons. Notes:
The first line in the file must be a header row defining which columns you are supplying in the import file.
Download a Starter CSV file with all the columns. Values are comma-separated.
OR choose which fields you want to supply from the following list:
'address', 'address2', 'altcontactaddress1', 'altcontactaddress2', 'altcontactaddress3', 'altcontactcountry', 'altcontactfirstname', 'altcontactphone', 'altcontactstate', 'altcontactsurname', 'altcontactzipcode', 'anonymized', 'auth_method', 'autorenew_checkouts', 'B_address', 'B_address2', 'B_city', 'B_country', 'B_email', 'B_phone', 'B_state', 'B_streetnumber', 'B_streettype', 'B_zipcode', 'borrowernotes', 'borrowernumber', 'branchcode', 'cardnumber', 'categorycode', 'checkprevcheckout', 'city', 'contactfirstname', 'contactname', 'contactnote', 'contacttitle', 'country', 'date_renewed', 'dateenrolled', 'dateexpiry', 'dateofbirth', 'debarred', 'debarredcomment', 'email', 'emailpro', 'fax', 'firstname', 'flags', 'gonenoaddress', 'initials', 'lang', 'lastseen', 'login_attempts', 'lost', 'middle_name', 'mobile', 'opacnote', 'othernames', 'overdrive_auth_token', 'password', 'password_expiration_date', 'phone', 'phonepro', 'primary_contact_method', 'privacy', 'privacy_guarantor_checkouts', 'privacy_guarantor_fines', 'pronouns', 'protected', 'relationship', 'secret', 'sex', 'sms_provider_id', 'smsalertnumber', 'sort1', 'sort2', 'state', 'streetnumber', 'streettype', 'surname', 'title', 'updated_on', 'userid', 'zipcode',
If loading patron attributes, the 'patron_attributes' field should contain a comma-separated list of attribute types and values. The attribute type code and a colon should precede each value. For example: INSTID:12345,LANG:fr or STARTDATE:January 1 2010,TRACK:Day. If an input record has more than one attribute, the fields should either be entered as an unquoted string (previous examples), or with each field wrapped in separate double quotes and delimited by a comma: "STARTDATE:January 1, 2010","TRACK:Day". The second syntax would be required if the data might have a comma in it, like a date string.
Required fields: The fields 'surname', 'branchcode', and 'categorycode' are required and 'branchcode' and 'categorycode' must match valid entries in your database.
'password' should be stored in plaintext, and will be converted to a Bcrypt hash (if your passwords are already encrypted, talk to your system administrator about options). Passwords will not be updated on overwrite unless replace passwords option is checked.
Date formats should match your system preference, and must be zero-padded, e.g. '01/02/2008'. Alternatively, you can supply dates in ISO format (e.g., '2010-10-28'). - Navigate to Tools: Look for the "Tools" section in the main menu or sidebar of the Koha Staff Interface.
-
Select "Import Patrons": Within the Tools section, locate the option for "Patron Import/Export" and click on it.
-
Choose Import Option: Select the "Import Patrons" option from the Patron Import/Export screen.
-
Upload CSV File: Click on the "Choose File" or similar button to select the CSV file containing the patron data from your computer. Once selected, upload the file.
-
Map Fields: Koha will prompt you to map the fields from your CSV file to the corresponding fields in Koha. This step ensures that the data is imported correctly. Match each field from your CSV file to the corresponding field in Koha (e.g., Name -> First Name, Address -> Street Address, etc.).
-
Validate and Import: Once you've mapped all the fields, Koha will validate the data to ensure it meets the required format. Review any validation errors or warnings and make corrections as necessary. Once validation is successful, proceed with the import process.
-
Review Import Summary: After importing, review the import summary to verify the number of patrons imported and any relevant information.
-
Confirm: Confirm that the import was successful and review the imported patron records to ensure accuracy.
-
Communicate: If necessary, communicate with patrons to inform them of any changes or updates resulting from the import process.
Patron /User List
To create a patron list in Koha, you can follow these steps:
Patron Batch Modification
Patron Card Creator
To create patron cards in Koha, you can follow these steps:
Reporting
Koha's reporting module allows users to generate various reports to analyze library data. Reports cover circulation, cataloging, acquisitions, patrons, serials, and custom SQL queries. Users can customize reports with parameters such as date ranges, branches, and item types. Reports can be viewed within Koha, exported in multiple formats, and scheduled for automatic generation and distribution via email. The module enables libraries to make data-driven decisions to improve services and resources.
Reporting options
Koha's reporting module allows users to generate various reports to analyze and monitor library data. Here's an overview of Koha's reporting module:
-
Accessing the Reporting Module: Log in to the Koha Staff Interface and navigate to the "Reports" or "Reporting" section.
-
Types of Reports: Koha offers several types of reports, including:
- Circulation Reports: Analyze circulation statistics such as loans, returns, fines, and holds.
- Cataloging Reports: Track cataloging activities, such as items added, modified, or deleted.
- Acquisition Reports: Monitor acquisitions, including orders, budgets, and vendor activity.
- Patrons Reports: View information about library patrons, such as registered users, borrowers, and fines owed.
- Serials Reports: Manage serials subscriptions, including renewal, cancellations, and issues received.
- Custom SQL Reports: Create custom reports using SQL queries for specific data analysis needs.
-
Report Parameters: Each report may have specific parameters to customize the data selection and presentation. Parameters may include date ranges, branches, item types, patron categories, and more.
-
Generating Reports: After selecting a report type and setting parameters, click on the "Generate" or "Run Report" button to generate the report.
-
Viewing Reports: Once generated, reports can be viewed directly within the Koha interface. Reports may be displayed in tabular format or as charts and graphs for visual analysis.
-
Exporting Reports: Koha allows users to export reports in various formats such as CSV, Excel, PDF, or HTML for further analysis or sharing with stakeholders.
-
Saving and Sharing Reports: Users can save report configurations for future use and share reports with other staff members or administrators.
-
Scheduled Reports: Koha also supports scheduling reports to run automatically at specified intervals and deliver them via email to designated recipients.
-
Customization and Extension: Advanced users can customize existing reports or create new reports using Koha's flexible reporting framework and custom SQL queries.
Accession Registrar
Let's retrieves the following information for the accession register report:
- Date of accession
- Accession number (barcode)
- Author or editor
- Title
- Edition or publication year
- Place of publication and publisher
- Volume or page number
- Source
- Price
- ISBN
- Remarks column (currently set to NULL)
Backup
Database Backup Restore
A Simple Database Backup:
You can use mysqldump to create a simple backup of your database using the following syntax.
Execute the following commands at the terminal to backup the koha database
Command:
mysqldump -u [username] -p [password] [databasename] > [backupfile.sql][username] - this is your database username
[password] - this is the password for your database
[databasename] - the name of your database
[backupfile.sql] - the file to which the backup should be written.
mysqldump –u root -p koha_library> backup_05-10-2016.sqlA Simple Database Restore:
If you have to re-build your database from scratch, you can easily restore the mysqldump file by using the mysql command. This method is usually used to recreate or rebuild the database from scratch.
Here's how you would restore your backup_15-10-2016.sql file to the Customers database.
Execute the following commands at the terminal to restore the koha database
mysql –u root -p koha_library< backup_05-10-2016.sql #mysql -u [username] -p [password] [database_to_restore] < [backupfile]
Or we can use phpmyadmin to do this easily.